


Black and white photography relies heavily on the skillful manipulation of contrast. The right balance of tones can transform flat gray images into captivating photographs that evoke depth and emotion. In a recent video by Jeff Ascough and Sarah G Ascough from the creative studio W, they delve into the essential Lightroom sliders—clarity, texture, and dehaze—that define the quality of monochrome images.
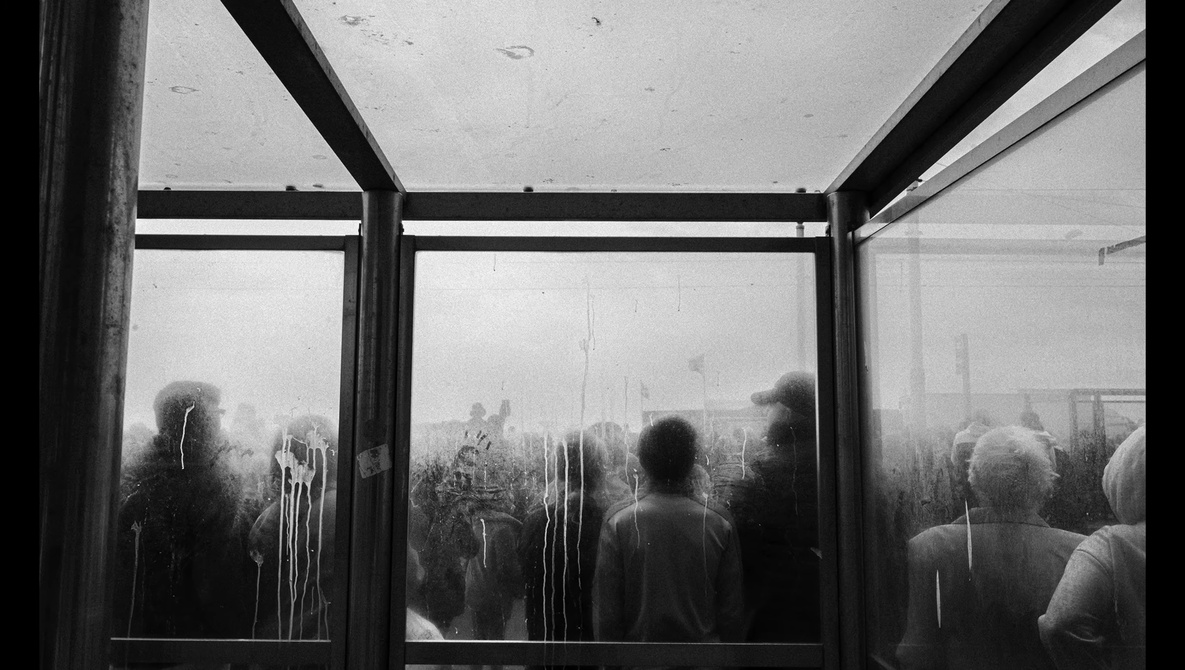
Ascough emphasizes that clarity primarily targets midtones, enhancing the structure and shape of details without overwhelming them. In contrast, the texture slider focuses on fine details such as skin, fabric, and the delicate edges of light around glass. Dehaze is particularly useful for extracting contrast from flat or misty skies; however, it can easily overpower a scene if adjusted too aggressively. Through an example photograph taken in Blackpool, Ascough illustrates how each slider adjustment can significantly alter both the contrast and mood of an image.
Understanding the Editing Process
The editing process begins with Ascough applying a profile to his image, which is crucial for establishing a solid foundation for the black and white conversion. By setting a strong black point early, he ensures that the image retains genuine shadows instead of appearing washed out. He then employs a tone curve to manage highlights and refine exposure, using brushes to apply selective adjustments across the frame.
Authenticity is Ascough’s primary focus rather than precision. He likens the digital editing process to traditional darkroom printing, valuing a handmade quality over sterile digital perfection. When he enhances clarity in selected areas, the image gains life, appearing textured yet not brittle. Conversely, excessive dehaze can result in harsh and unnatural tones. This demonstration highlights not only the mechanics of the sliders but also the importance of restraint in achieving craftsmanship in digital monochrome work.
In the latter half of the video, Sarah Ascough presents her photograph, which captures a scene from a county show. Here, she faces the challenge of balancing tonal contrasts among various subjects. Jeff uses the same profile and repeats the foundational steps of setting blacks and toning highlights. This time, he illustrates how clarity and texture can vividly portray animal fur without introducing artifacts.
Key Differences in Techniques
The distinction between utilizing curves versus sliders becomes evident as the video progresses. Curves facilitate smoother tonal transitions, while extensive use of sliders can produce uneven gray patches. Through meticulous brushing techniques, Jeff balances the scene without compromising its atmosphere. The final image gains a medium grain that adds a texture reminiscent of film’s inherent imperfections.
The video serves as an insightful guide, revealing the differences between technically correct black and white photography and images that engage viewers emotionally. Every step taken builds toward a comprehensive understanding of how to shape light in a digital format while preserving the essence of film.
For those interested in enhancing their skills in black and white photography, the video by the Ascoughs offers valuable lessons in creativity and technical execution. Alex Cooke, a photographer and meteorologist based in Cleveland, encourages viewers to explore these techniques further, as they foster a deeper appreciation for the artistry involved in monochrome photography.